The goal of this example is to show you how to get a Node.js application into a Docker container. The guide is intended for development, and not for a production deployment. The guide also assumes you have a working Docker installation ande a basic understanding of how a Node.js application is structured.
You can pull the finished code/image from my git/docker hub:
![]() https://github.com/drlukeangel/Docker-Node-Basic-App-Example
https://github.com/drlukeangel/Docker-Node-Basic-App-Example
https://hub.docker.com/r/drlukeangel/basic-node-docker-web-app/
In the first part of this guide i’ll create a simple web application in Node.js, then i’ll will build a Docker image for that application, and lastly i’ll will run the image as a container.
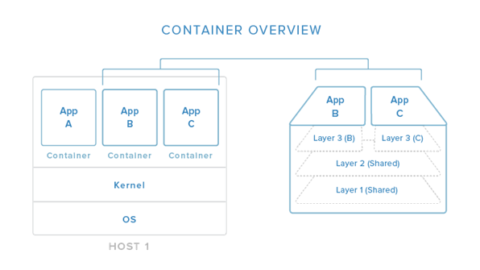
Docker allows you to package an application with all of its dependencies into a standardized unit, called a container, for software development. A container is a stripped-to-basics version of a Linux operating system. An image is software you load into a container.
Create the Node.js app
First, create a new directory where all the files would live. In this directory create a package.json file that describes your app and its dependencies:
{
  "name": "Docker-Node-Basic-App",
  "description": "basic node app for insterting into docker",
  "version": "1.0.0",
  "author": "Luke Angel",
  "scripts": {
    "start": "node server.js"
  },
  "dependencies": {
    "express": "~4.13.4"
  }
}
Then, create a server.js file that defines a web app using the Express.js framework:
'use strict';

const express = require('express');

// Constants
const PORT = 8080;

// App
const app = express();
app.get('/', function (req, res) {
   res.send('Hello world\n');
});

app.listen(PORT);
console.log('Running on http://localhost:' + PORT);
In the next steps, we’ll look at how you can run this app inside a Docker container using the official Docker image. First, you’ll need to build a Docker image of your app.
Creating a Dockerfile
Create an empty file called Dockerfile:
touch Dockerfile
Open the Dockerfile in your favorite text editor
The first thing we need to do is define from what image we want to build from. Here we will use the latest LTS (long term support) version argon of node available from the Docker Hub:
FROM node:argon
Next we create a directory to hold the application code inside the image, this will be the working directory for your application:
# Create app directory
RUN mkdir -p /usr/src/app WORKDIR /usr/src/app
This image comes with Node.js and NPM already installed so the next thing we need to do is to install your app dependencies using the npm binary:
# Install app dependencies
COPY package.json /usr/src/app/ RUN npm install
To bundle your app’s source code inside the Docker image, use the COPY instruction:
# Bundle app source
COPY . /usr/src/app
Your app binds to port 8080 so you’ll use the EXPOSE instruction to have it mapped by the docker daemon:
EXPOSE 8080
Last but not least, define the command to run your app using CMD which defines your runtime. Here we will use the basic npm start which will run node server.js to start your server:
CMD [ "npm", "start" ]
Your Dockerfile should now look like this:
#The first thing we need to do is define from what
#image we want to build from. Here we will use the
#latest LTS (long term support) version argon of node available from the Docker Hub:
FROM node:argon

# ext we create a directory to hold the application
#code inside the image, this will be the working directory for your application:
RUN mkdir -p /usr/src/app
WORKDIR /usr/src/app

#This image comes with Node.js and NPM already installed
#so the next thing we need to do is to install your app dependencies using the npm binary:
COPY package.json /usr/src/app/
RUN npm install

#To bundle your app's source code inside the Docker image, use the COPY instruction:
#note the (.) means that everything from this level and its childern will be copied
#into the user/src/app directory of the container
# Bundle app source
COPY . /usr/src/app

#This app accepts requests over port 8080 so now have to make sure it exposes it
EXPOSE 8080

#Last but not least, define the command to run your app using CMD which defines your runtime.
#Here we will use the basic npm start which will run node server.js to start your server:
CMD [ "npm", "start" ]
Building your image
Go to the directory that has your Dockerfile and run the following command to build the Docker image. The -t flag lets you tag your image so it’s easier to find later using the docker images command:
$ docker build -t <your username>/node-web-app .
Your image will now be listed by Docker:
$ docker images # Example REPOSITORY TAG ID CREATED node argon 539c0211cd76 3 weeks ago <your username>/node-web-app latest d64d3505b0d2 1 minute ago
Run the image
Running your image with -d runs the container in detached mode, leaving the container running in the background. The -p flag redirects a public port to a private port inside the container. Run the image you previously built:
$ docker run -p 49160:8080 -d <your username>/node-web-app
Print the output of your app:
# Get container ID $ docker ps # Print app output $ docker logs <container id> # Example Running on http://localhost:8080
If you need to go inside the container you can use the exec command:
# Enter the container $ docker exec -it <container id> /bin/bash
Test
To test your app, get the port of your app that Docker mapped:
$ docker ps # Example ID IMAGE COMMAND ... PORTS ecce33b30ebf <your username>/node-web-app:latest npm start ... 49160->8080
In the example above, Docker mapped the 8080 port inside of the container to the port 49160 on your machine.
Now you can call your app using curl (install if needed via: sudo apt-get install curl):
$ curl -i localhost:49160
Response:
StatusCode        : 200
StatusDescription : OK
Content           : Hello world

RawContent        : HTTP/1.1 200 OK
                    Connection: keep-alive
                    Content-Length: 12
                    Content-Type: text/html; charset=utf-8
                    Date: Mon, 14 Nov 2016 18:04:40 GMT
                    ETag: W/"c-8O9wgeFTmsAO9bdhtPsBsw"
                    X-Powered-By: Express

                    H...
Forms             : {}
Headers           : {[Connection, keep-alive], [Content-Length, 12], [Content-Type, text/html; charset=utf-8], [Date,
                    Mon, 14 Nov 2016 18:04:40 GMT]...}
Images            : {}
InputFields       : {}
Links             : {}
ParsedHtml        : mshtml.HTMLDocumentClass
RawContentLength  : 12
I hope this tutorial helped you get up and running a simple Node.js application on Docker.
You can find more information about Docker and Node.js on Docker in the following places:

